How Start Learning CLO 3D in 2024 | 6 Step Guide for Beginners
Introduction
The fashion industry is currently undergoing a revolution with the advent of 3D technology, and one key tool for learning about 3D fashion is CLO 3D. In this article, a framework of 6 steps for learning 3D Fashion with CLO 3D will be provided. Let’s now immerse ourselves in the world of 3D fashion with CLO 3D, a groundbreaking tool that is reshaping the fashion industry.
In this blog, you will be guided through 6 steps to learn 3D fashion with CLO 3D, which has been specifically designed for beginners. There are many 3D fashion software but we will be discussing CLO 3D in depth.
Step 1: Understand the Basics of 3D fashion with CLO 3D
What is CLO 3D?
In the 6 Steps of learning 3D fashion with CLO 3D let’s look into the first stage of understanding CLO 3D. It is a 3D fashion design software that allows designers to create virtual, true-to-life garment visualizations. Before you dive in, it’s important to understand its interface and basic functionalities. Any digital fashion software like CLO 3D has 5 major learning steps:
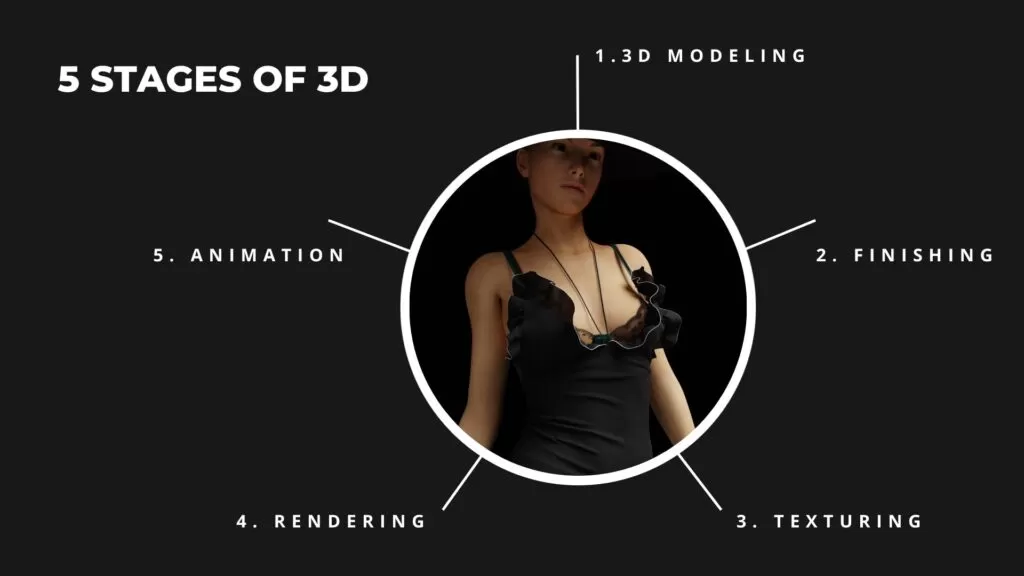
5 Major Concepts in 3D fashion with CLO 3D
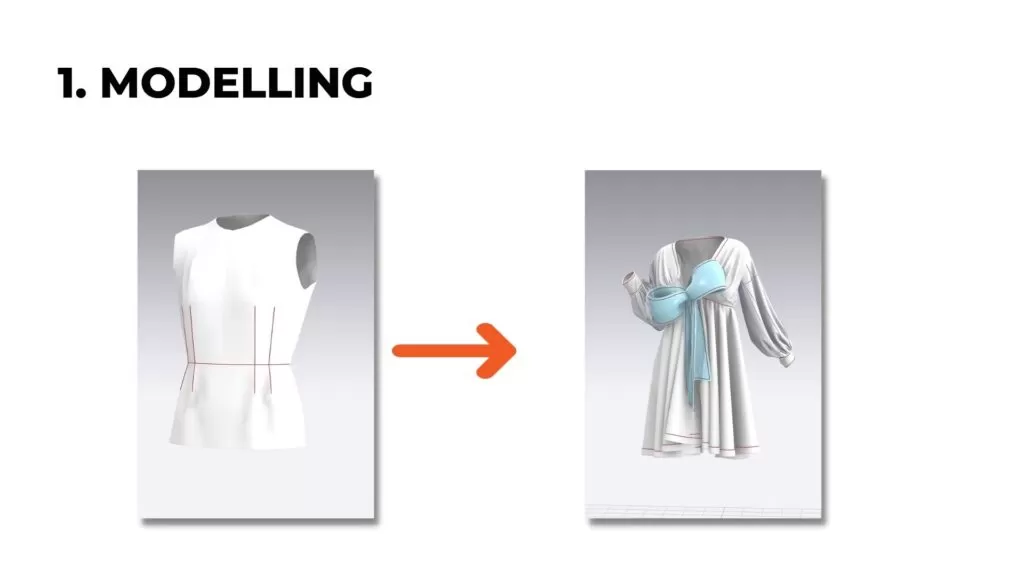
1. Modeling
A simple process of taking a basic shape and converting it into a desired shape. eg. You can take a basic torso and convert it into a dress. This process involved the understanding of pattern making and hence pattern making becomes an essential part of modeling in digital fashion with CLO 3D.
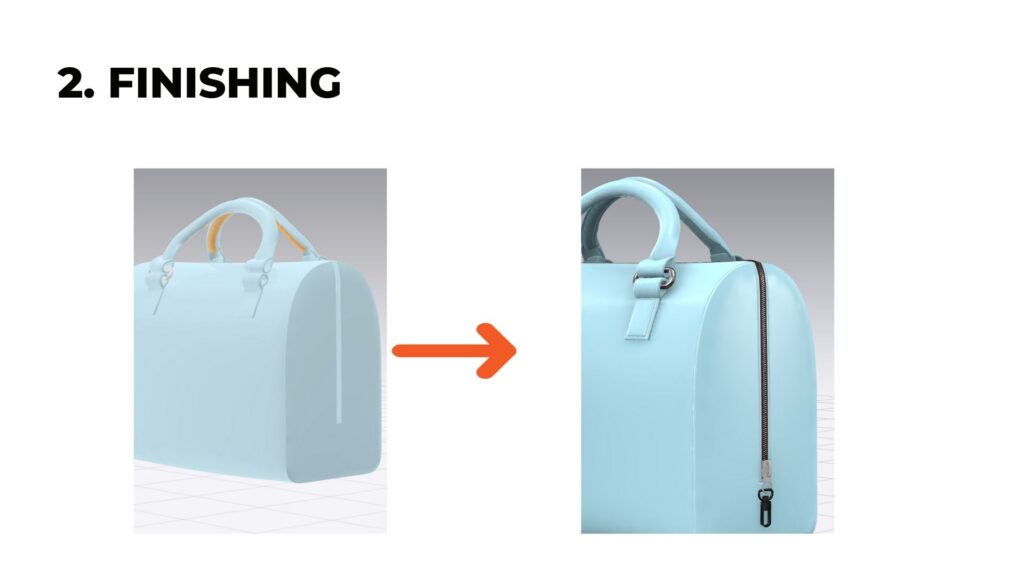
2. Finishing
The finishing process of a 3D-designed garment marks a pivotal stage, where trims, seams, and various intricate details are incorporated, resulting in the comprehensive construction of the garment. This phase is of paramount importance as it is not only where authenticity is imparted to your creation but also where the overall realism of the final appearance is elevated. In this context, two crucial topics are to be considered for the finishing process:
- Garment seams & Construction
- Trims & Accessories
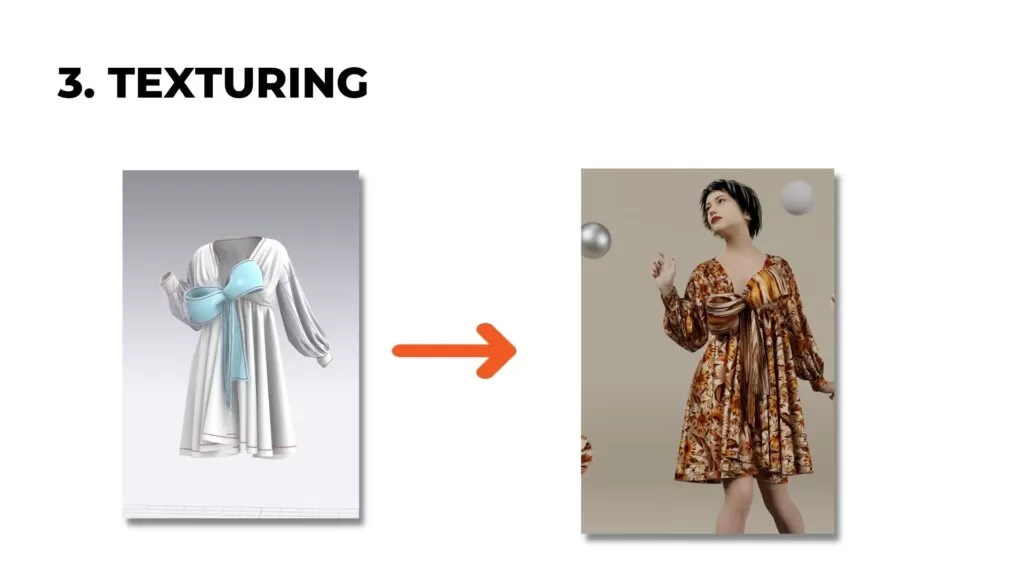
3. Texturing
After designing a 3D garment, it becomes essential to grasp the nuances of various fabrics, such as woven and knit, along with their properties like texture, luster, thickness, GSM (grams per square meter), and surface attributes such as prints and embroidery. This understanding is pivotal for effectively conveying the specifics of the garment you’ve created. This procedure of conveying the fabric characteristics in the garment is referred to as the Texturing process.
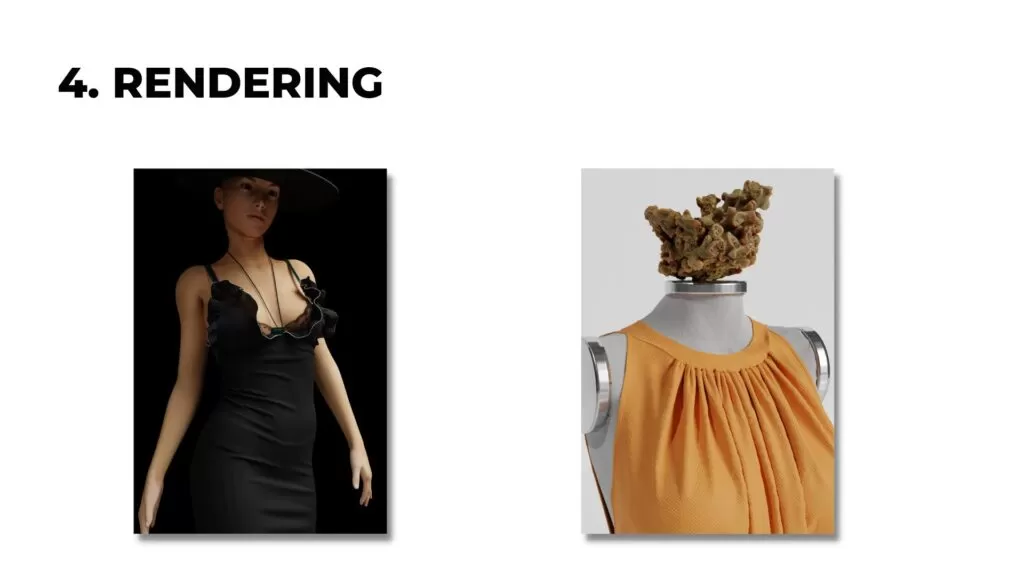
4. Rendering
Once your garment is prepared, the subsequent step entails the configuration of lighting, camera, environment, and props in order to capture and render images. Within the realm of 3D rendering, this process represents the transformation of a three-dimensional (3D) scene or model into a two-dimensional (2D) image or animation.
This intricate simulation is characterized by the replication of the interplay of light with objects in the 3D space, with meticulous consideration given to elements such as illumination, materials, textures, and the selected camera perspective. As a result, lifelike visuals are generated, imbuing your garment and its surroundings with vivid, realistic life.
5. Animation
Ultimately, you can breathe life into your avatar and garment by incorporating animation. This involves a two-fold process: firstly, “rigging” your avatar to enable movement, and secondly, simulating the garment based on the rigging.
It’s important to note that animation can be a time-consuming endeavor, and the speed of rendering is influenced by your PC’s graphics card. Nevertheless, it’s an immensely enjoyable process as it brings your garment to life, allowing you to witness it gracefully draping and moving in a virtual real-life setting.
Let’s Now Dive into each of the individual stages of learning digital fashion with CLO 3D in-depth.
Learn 3D-Fashion Platform is the #1 platform for learning 3D Digital fashion. With a remarkable student base exceeding 2800+ individuals from over 10+ countries, our platform has attracted esteemed brands and institutions including NIKE, Harvard, FIT, and UAL.
Step 2: Understanding Modeling for Learning CLO 3D
What is Modeling in CLO
The second step of 6 Steps of learning 3D fashion with CLO 3D is modeling. It involves the creation of digital representations or simulations of clothing, garments, and accessories within three-dimensional (3D) computer graphics environments. Within this modeling process, our starting point can be a basic shape, such as a torso, which can be transformed into various garments, like a dress. Consequently, an understanding of pattern-making methods and techniques becomes paramount when learning about modeling in 3D fashion with CLO 3D.
What Makes pattern-making so important for Modeling and learning CLO 3D
Pattern-making is pivotal in the context of fashion modeling and learning 3D fashion with CLO 3D for several reasons. Pattern-making serves as the foundation for creating garments. It involves the precise construction of templates (patterns) that dictate how pieces of fabric are cut and sewn together to form a garment. Understanding patterns is essential for designing clothing, and this knowledge is directly applicable when creating digital representations of garments in CLO 3D.
By starting with well-crafted patterns, a seamless transition can be made from the two-dimensional (2D) realm of patterns to three-dimensional (3D) fashion models. This enables the creation of realistic, detailed clothing simulations in CLO 3D.
Furthermore, the importance of pattern-making lies in its ability to facilitate the accurate replication of real-world garments within the digital environment, ensuring a high level of precision and authenticity in the final 3D representations. Ultimately, it is through the mastery of pattern-making techniques that fashion modelers and CLO 3D learners can achieve excellence in their craft.
Some of the key concepts of patternmaking that are required with learning 3D fashion with CLO 3D are:
- Basic Pattern Blocks: These are the foundational patterns used as a starting point for creating various garment designs. Common basic blocks include bodice, skirt, and trouser blocks.
- Dart Manipulation: Darts are folded or tapered fabric tucks that help shape the garment to fit the body. Understanding how to manipulate and reposition darts is crucial for achieving different styles and fits.
- Grading: Grading involves creating patterns in multiple sizes to accommodate a range of body shapes. This process ensures that a design can be produced in various sizes while maintaining its proportions.
- Symmetry: Maintaining symmetry in pattern pieces is crucial for ensuring that the finished garment looks balanced and well-proportioned.
- Other concepts: Understanding different concepts like Dart Manipulation (Tuck-Darts, Pleats, Flares, and Gathers), Style lines, Added Fullness, Yokes, Flanges, Pin Tucks, Pleat Tucks, Contouring, grading, and others..
Step 3: Understanding Finishing for Learning CLO 3D
What is Finishing?
The third step of the 6 Steps of learning 3D fashion with CLO 3D is Finishing. It is the unsung hero of the 3D fashion world. If you’re working in CLO 3D or similar 3D clothing software, nailing the finishing can mean the difference between a flat, lifeless design and a virtual garment that mirrors real-life texture and fit. This vital step brings your 3D clothing designs to life by adding those crucial final touches: trims and seams.
Two most important topics covered under 3D fashion finishing are:
1. Trims
Firstly, let’s talk about trims. Trims are essential in 3D fashion because they add both aesthetic appeal and functional value to your 3D clothing. These elements include everything from zippers and buttons to patches and lace. In CLO 3D, you have the liberty to choose from a wide variety of pre-designed trims or even create your own.
How to Effectively Utilize Trims
- Consider Functionality: Make sure the trims serve a purpose, whether it’s a zipper that actually opens or a decorative brooch.
- Play with Aesthetics: Choose trims that complement the overall design. In CLO 3D, you can easily experiment with different styles and colors.
- Attention to Scale: It’s vital to ensure the trimmings are proportional to your 3D clothing item. Too big or too small, and it could throw off the entire look.
- Quality over Quantity: Adding too many trims can make your design look cluttered. Focus on select elements that truly elevate your design.
2. The Significance of Seams
Next up are seams, the building blocks of any clothing item, 3D or otherwise. In 3D fashion, seams are more than just joining two fabric pieces together; they define the shape, structure, and even the flow of the garment.
Mastering the Art of Seams in 3D Fashion
- Seam Type Matters: Different types of seams serve different functions. In CLO 3D, you can choose from a range of seam types to fit the specific needs of your design.
- Focus on Realism: Seams should emulate real-world sewing techniques. Make sure your seams in the 3D environment are as realistic as possible to give your clothing a natural look.
- Seam Placement: Strategic seam placement can influence the garment’s fit and drape. Take your time to adjust and preview different seam placements in CLO 3D.
- Testing and Adjusting: The beauty of 3D fashion is the ability to immediately see how changes affect your design. Tweak and fine-tune your seams until you achieve the desired outcome.
Check Our video to understand better
Step 4: Understanding Texturing for Learning CLO 3D
What is Texturing
Texturing is the fourth step of the 6 Steps of learning 3D fashion with CLO 3D. It is the heartbeat of 3D fashion, weaving life into your digital designs. In the realm of 3D clothing, especially when working with sophisticated software like CLO 3D, texturing is your secret weapon for adding fabrics, prints, and intricate details that catapult your creations from flat to fabulous.
Texturing is not just about aesthetics; it’s about capturing the essence of materials and how they interact with light, movement, and environment. To master this complex feature, you also need a thorough understanding of fabric properties, including different weaves, printing types, and dyeing methods.
Before diving into CLO 3D texturing maps, let’s get a grip on the fabric properties that can influence texturing in 3D fashion:
- Weave Types: Understanding the weave of the fabric can dramatically affect its look and feel. Is it a satin weave that’s smooth and shiny, or a twill weave that’s more textured?
- Printing Methods: From digital prints to traditional block printing, the printing method will influence the texture and visual depth of your fabric.
- Dyeing Techniques: Various dyeing techniques can impact the final appearance of your 3D clothing. For example, tie-dye will look vastly different from an evenly dyed garment.
Understanding some important texturing maps for CLO 3D learning
1. Texture/ Base color –
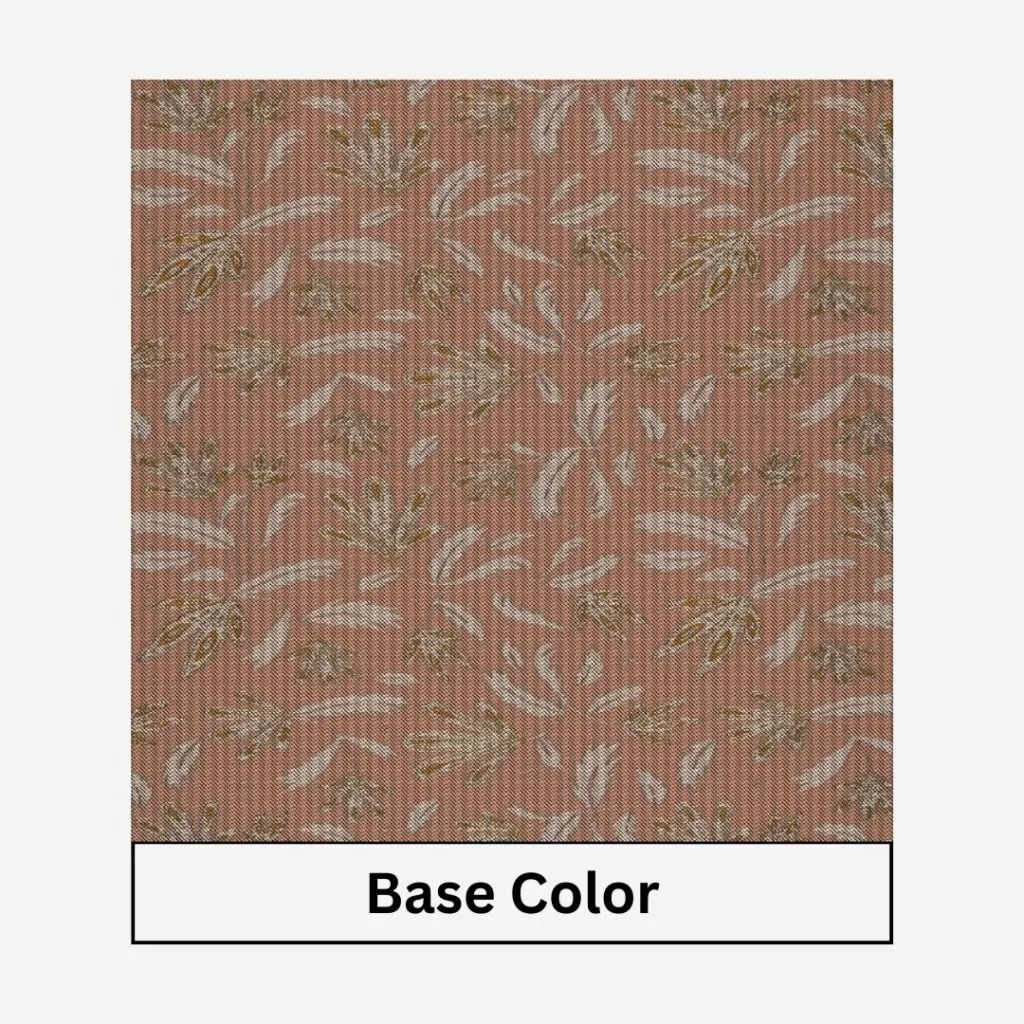
This is your starting point. The texture or base color map sets the fundamental color and pattern of your 3D clothing. It’s where you can unleash your creativity with vibrant hues, patterns, and detailed designs. One of the important points to remember is different methods of dyeing has a different effect on the fabric surface. For eg, surface print will have a different effect vs yarn dye vs garment dye.
2. Normal Map
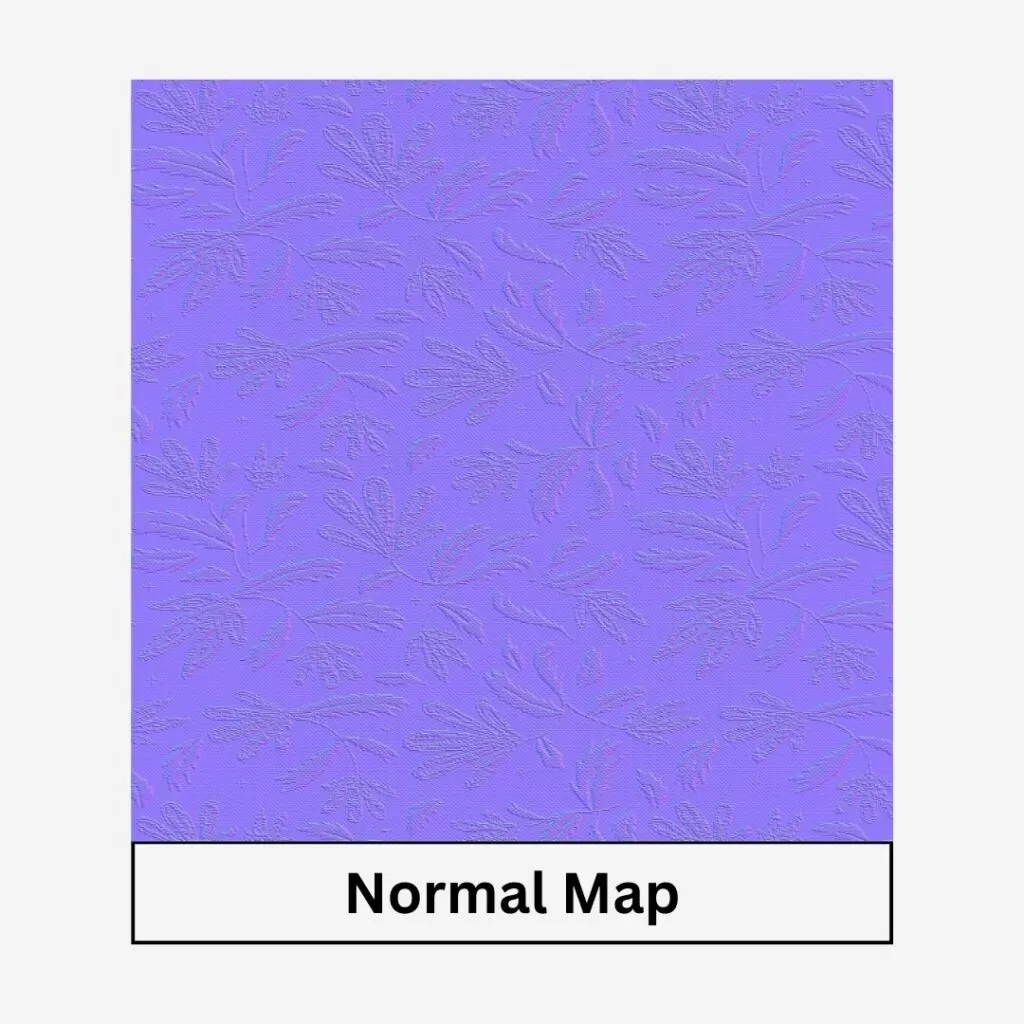
A normal map adds the illusion of depth and contour to your 3D fashion items. It manipulates how light interacts with the surface, giving it a more realistic appearance without adding complexity to your model.
3. Displacement Map
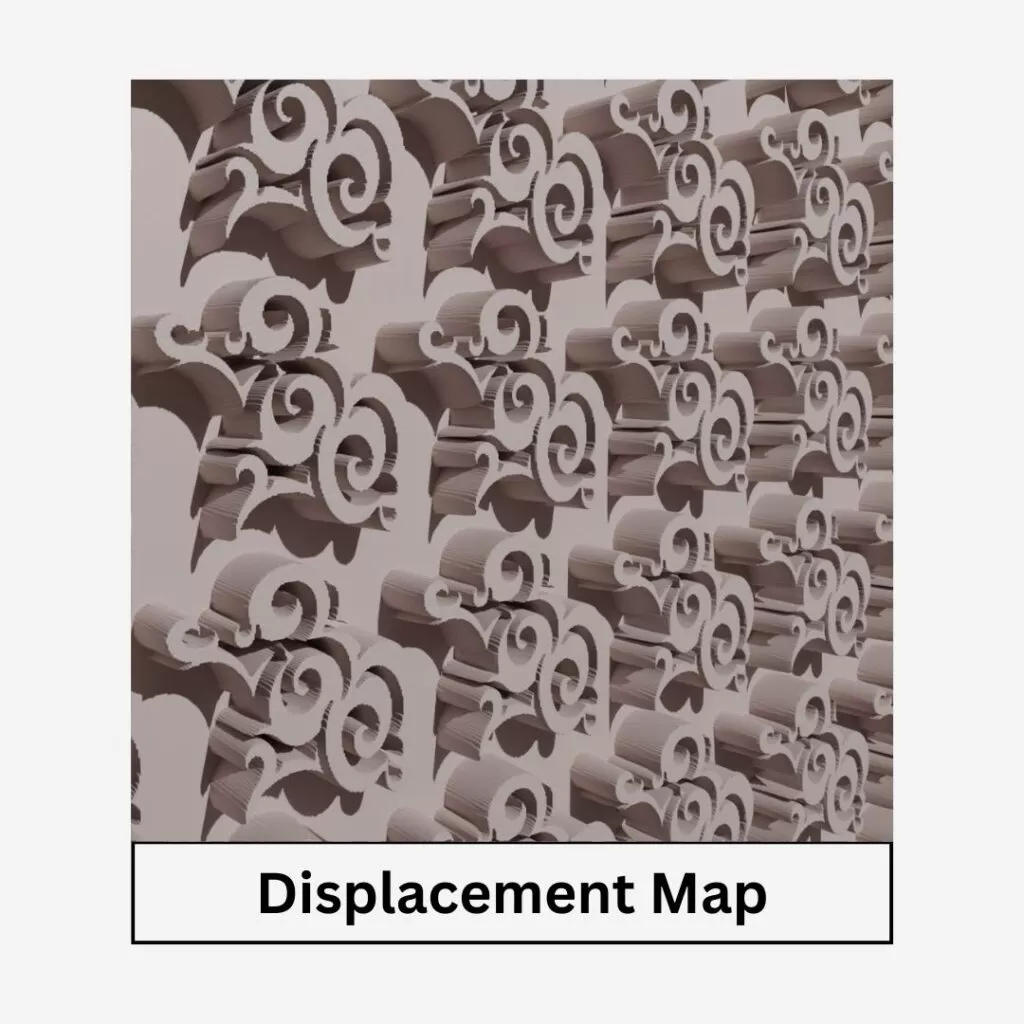
Taking it up a notch, the displacement map physically alters the geometry of your 3D clothing model. Unlike the normal map, which only simulates depth, a displacement map actually creates it, making the texture appear three-dimensional.
4. Opacity Map
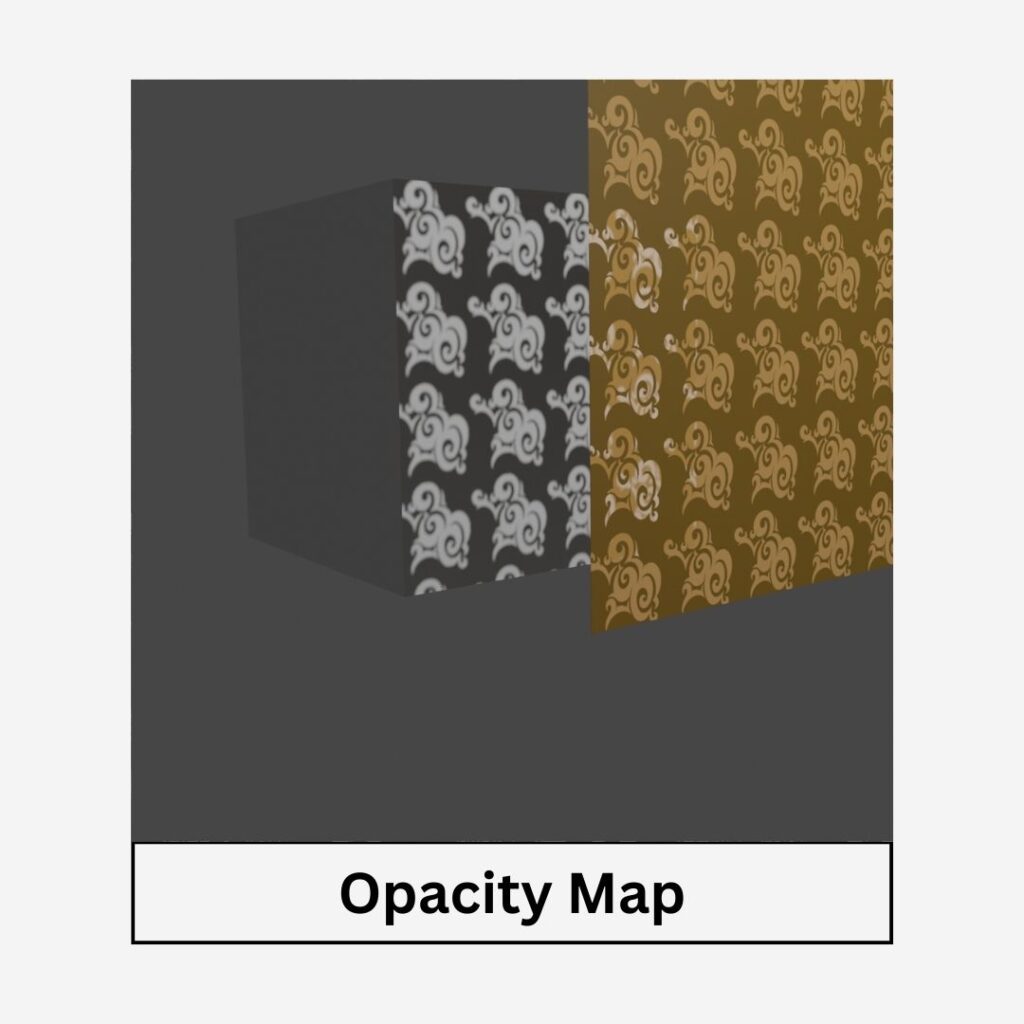
Want to add sheer elements to your 3D clothing? The opacity map is your go-to. It defines which areas of your garment are transparent and to what degree, offering endless possibilities for creating intricate layered designs.
5. Metallic/Roughness Map
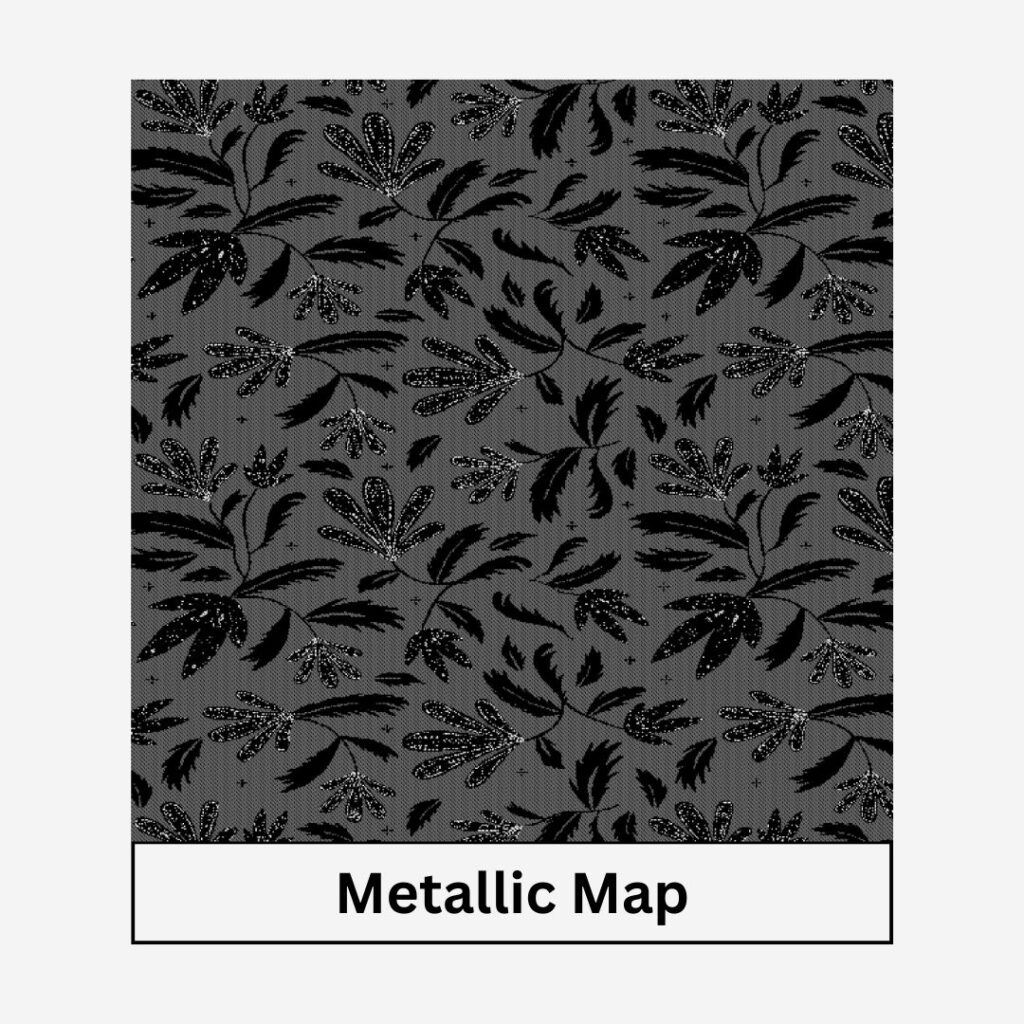
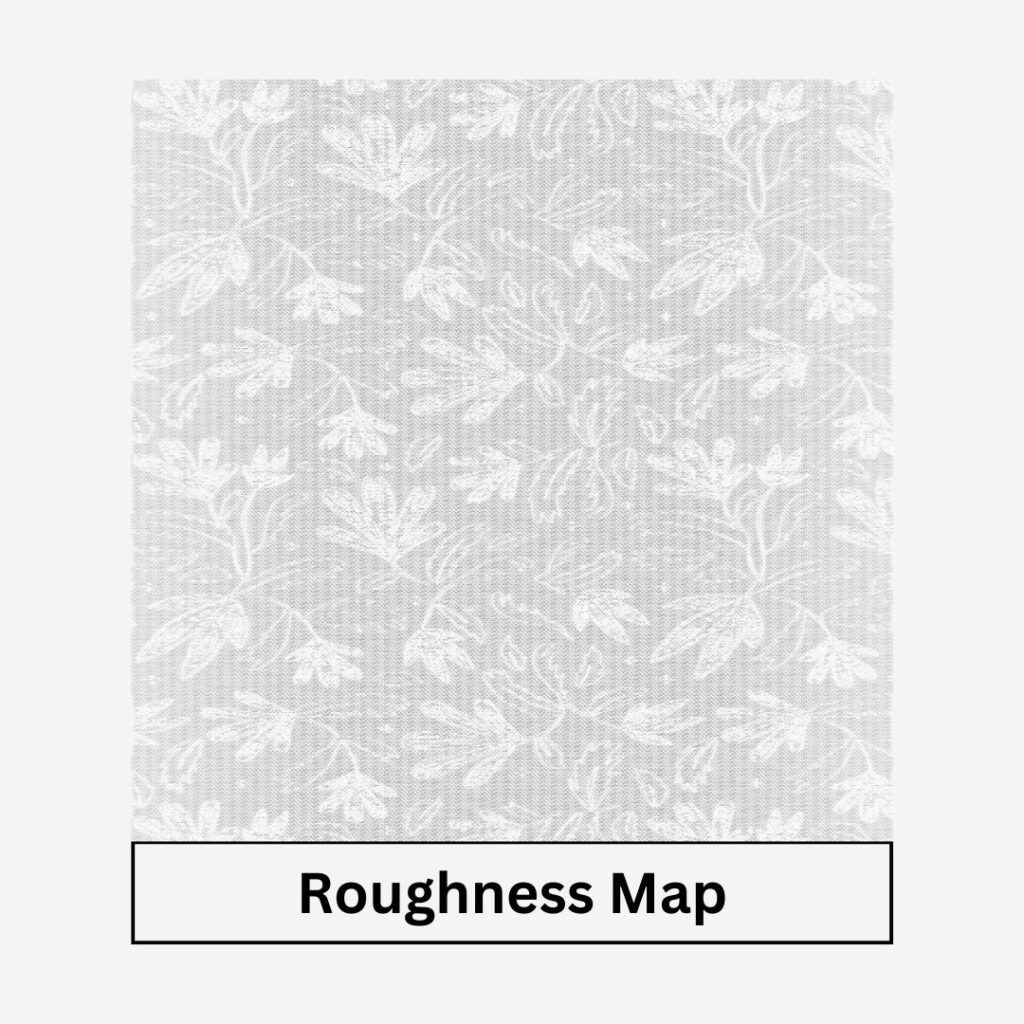
Last but not least, the metallic/roughness map controls how light interacts with your material, determining whether it appears metallic or matte. This is crucial for capturing the essence of different fabrics, from shiny silks to rugged denims.
Time to Get Hands-On: Where’s the Video?
You’ve read all about it, and now it’s time to see it in action. To truly understand these texturing maps, a visual guide is invaluable. If you’re serious about mastering texturing in 3D fashion with CLO 3D, be sure to watch video explaining the texturing process in detail.
Step 5: Understanding Rendering for CLO 3D
Rendering, the fifth step of the 6 Steps of learning 3D fashion with CLO 3D. It is the storytelling part of 3D fashion, transforming your meticulously crafted designs into vivid, photo-realistic images. As you navigate the complex yet exciting world of CLO 3D, understanding rendering becomes paramount. It’s not merely about creating a snapshot; it’s about telling a story. This compelling process allows you to encapsulate the essence, mood, and vision of your 3D clothing, making it an indispensable tool for 3D fashion storytelling.
What is Rendering and why it is important?
Rendering in 3D fashion, specifically in CLO 3D, refers to the computational process of generating a 2D image or animation from a 3D model. Think of it as taking a “photograph” of your virtual garment. Rendering brings together all the elements you’ve worked on—texturing, detailing, lighting—and fuses them into a final presentation.
Why Rendering is Crucial in 3D fashion?
- Realism: High-quality rendering lends a life-like quality to your 3D clothing, making it indistinguishable from real garments in photographs.
- Portfolio: A well-rendered image can serve as a standout piece in your design portfolio, showcasing not only your design skills but also your proficiency in CLO 3D.
- Client Presentations: When pitching a design to clients, a high-quality render can communicate your concept more effectively than sketches or verbal descriptions.
Important Aspects of Rendering for Effective Storytelling
Let’s dive deeper into some of the crucial components of rendering in CLO 3D that can take your storytelling to the next level.
Camera
- What It Is: The camera function in CLO 3D allows you to control the viewpoint from which your 3D clothing will be rendered.
- Why It Matters: Camera positioning and angles can dramatically affect the perception of your garment. A high-angle shot might make it look submissive, while a low-angle shot could impart a sense of grandeur.
- How to Use It: Experiment with various camera angles and positions to find the one that most effectively conveys the story or emotion you’re aiming to evoke.
Lights / Storytelling
- What It Is: Lighting in CLO 3D pertains to the use of different light sources and their positioning relative to the 3D model. Hence becomes important that you understand how to setup different lights for fashion shoots in the real world first.
- Why It Matters: The right lighting setup can not only highlight the best features of your 3D clothing but also set the mood for your entire design. For instance, dramatic, high-contrast lighting can convey a sense of urgency or excitement.
- How to Use It: Use directional lights to focus attention on specific elements, or ambient lights to create a more natural, diffuse lighting scenario. The lighting should be in harmony with the narrative you’re aiming to construct.
Check the video below to understand more:
Learn 3D-Fashion Platform is the #1 platform for learning 3D Digital fashion. With a remarkable student base exceeding 2800+ individuals from over 10+ countries, our platform has attracted esteemed brands and institutions including NIKE, Harvard, FIT, and UAL.
Step 6: Understanding Animation for 3D Fashion with CLO 3D
The last step of the 6 Steps of learning 3D fashion with CLO 3D is animation. While designing your 3D clothing is one aspect, bringing it to life through animation is another beast entirely. Animation in digital fashion serves as a dynamic canvas, where you can visualize how your designs interact with movement, space, and even storytelling elements like avatars and props.
What is Animation and How Does it Work in Digital Fashion?
In the simplest terms, animation involves creating a series of images that show movement when played in a sequence. Within the context of digital fashion, specifically using platforms like CLO 3D, animation allows you to simulate real-world interactions involving your 3D clothing. You’re not just displaying static garments; you’re showing how they move, flow, and fit on an avatar in a specific environment. In doing so, animation adds a layer of realism and dynamism that static images simply can’t match.
Why is Animation Crucial in 3D Fashion?
- Realistic Presentation: Animation helps in showcasing how your 3D clothing will look and behave in real-world conditions, which is invaluable for client presentations and portfolios.
- Interactive Demos: Animated 3D fashion can serve as an interactive demo, providing a clearer idea of a garment’s look and fit, thus enhancing customer experience in online shopping.
- Design Validation: Viewing your garment in motion can help you spot design flaws or areas for improvement that may not be obvious in a static presentation.
In the exciting realm of 3D fashion, especially when using sophisticated software like CLO 3D, it’s not just about designing a garment; it’s about creating an experience. Three key aspects contribute to this immersive experience: Avatar Animation and Rigging, Garment Simulation, and Environment and Prop.
Let’s delve into each one to understand their significance.
- Avatar Animation and Rigging – The initial phase involves perfecting avatar animation. While CLO 3D offers a variety of animation templates, you may desire a custom avatar and unique animations. For this, external software like Mixamo, MakeHuman, or DazStudio comes into play. Additionally, you’ll need 3D software such as Blender to seamlessly blend different animations together. Once your avatar is fully animated, it’s ready for import into CLO 3D, setting the stage for the next exciting steps.
- Garment Simulation – After your animated avatar is in place, it’s time to introduce your 3D clothing into CLO 3D, preparing it for animation. Before proceeding, it’s crucial to understand the characteristics of your chosen fabric. Relying solely on CLO 3D isn’t sufficient; real-world, hands-on experience with the fabric is invaluable for accurate garment simulation.
- Environment and Props – After syncing your avatar and garment simulation, the next task is to design the surrounding environment, which plays a pivotal role in narrating your design story. While CLO 3D offers some default stages, utilizing software like Blender enables you to create more detailed environments and props. These can be exported to CLO 3D to enrich the overall animation experience.
Check the video below to understand better:
Conclusion
Embarking on a journey to master 3D fashion with CLO 3D is akin to stepping into a dynamic world filled with unlimited creative possibilities. As we’ve explored, there are six essential steps that serve as the cornerstone of this journey. Starting from grasping the fundamentals of 3D fashion, you’ll move on to delve into the intricacies of modeling, finishing, and texturing to bring your designs to life. But it doesn’t stop there; understanding the nuances of rendering and animation ensures that your 3D clothing is not only visually stunning and technically correct but also tells a compelling story.